Eclipse is an open-source extensible integrated development environment (IDE). It has a well-designed and extensible architecture and allows anyone to build solutions that integrate seamlessly with the environment and other tools.
Jelastic has also created a dedicated plugin for Eclipse development platform. It represents a set of software development tools, that simplifies the process of applications development at Eclipse IDE, where they are handled in the form of projects (Java EE) at Jelastic PaaS.
Within the instructions below, you can find out in details how to install the plugin, manage Jelastic PaaS environments and deploy your projects through Eclipse.
Eclipse Plugin Installation
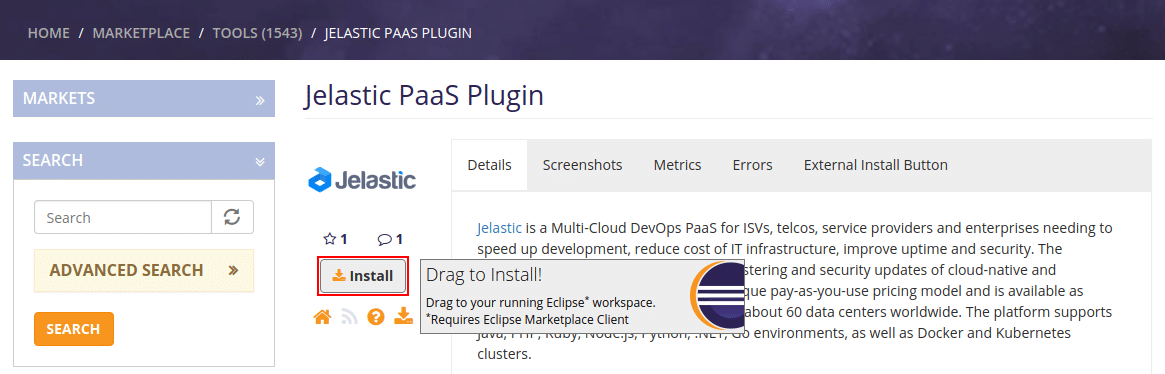
1. Open the Eclipse Marketplace page with Jelastic PaaS Plugin in a browser. Click on and drag the plugin installation button (circled in the image below) into your running Eclipse workspace.
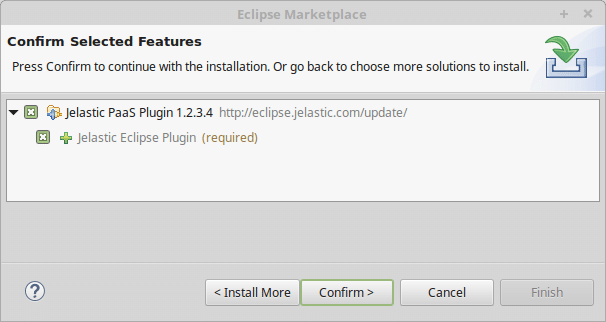
2. In the opened frame you can check and edit the list of installed software. In our case, there is only Jelastic Eclipse Plugin listed, so just click on Confirm.
3. At the next step, you’ll need to read and accept the license agreement.
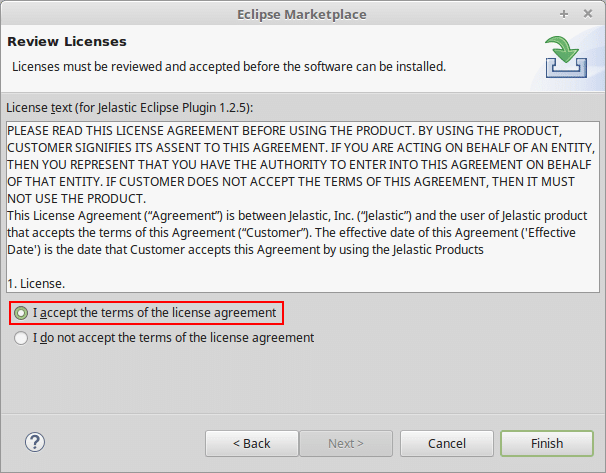
Click on Finish in order to proceed with the installation.
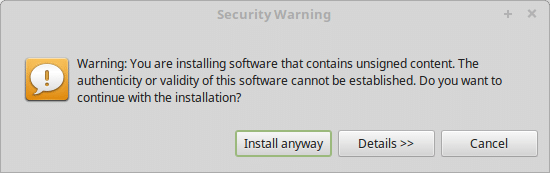
4. If you receive a security warning, click the Install anyway button to proceed and wait a minute for this operation to be completed.
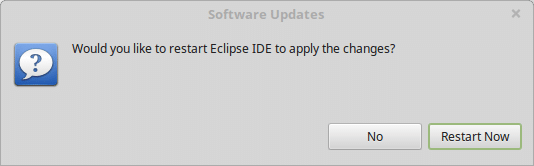
5. Restart your Eclipse IDE by clicking Restart Now on the last frame to apply the changes and finish the installation.
Authentication with Jelastic Account Credentials
The next step is to connect the plugin with your account at Jelastic PaaS. For that, navigate to Window > Preferences > Jelastic Preferences.
In the opened Eclipse tab, fill in the Login and Password fields with the corresponding data and select the Jelastic PaaS provider from the drop-down list.
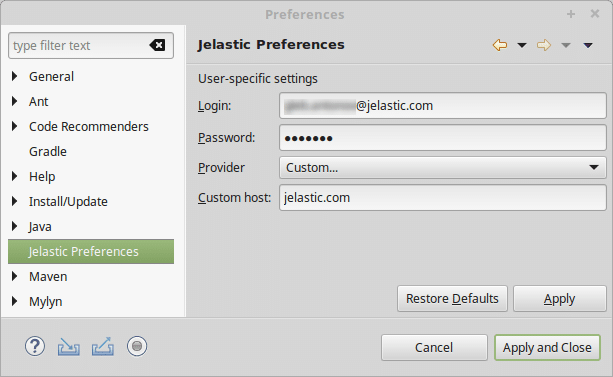
Select the Apply and Close button to confirm the entered data.
That’s all the required configurations! Now, having the Jelastic Eclipse plugin installed, you can manage Jelastic PaaS environments and deploy new projects easily without switching between IDE and browser.
Eclipse Plugin Management
Before proceeding further with the new projects deployment, consider the basics of remote Jelastic PaaS environments management through Eclipse IDE.
1. Navigate to the Window > Show View > Other section.
Here, you can notice that Jelastic Cloud Platform category has been added to the list.
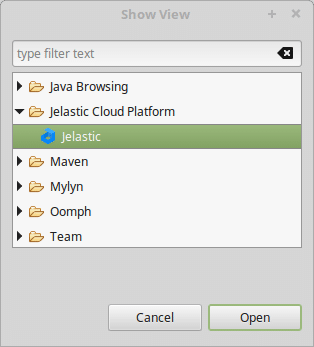
Expand this menu item and Open the Jelastic view.
2. In the opened tab, your current Jelastic PaaS environments with the applications deployed can be viewed (obviously, only Java-based ones will be displayed).
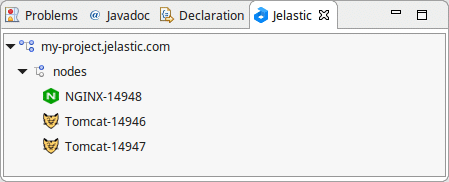
Here, environments can be quickly managed through the context menu (called with the right mouse button click) by choosing the needed option: Start, Stop or Refresh.
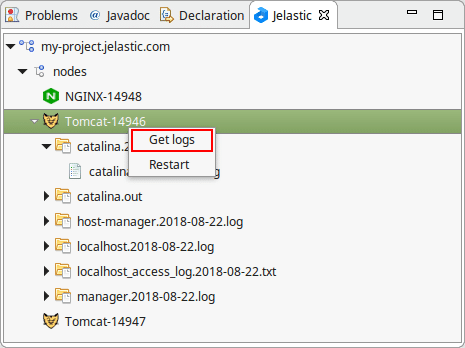
3. You can Get logs for a particular node and view them directly in Eclipse IDE.
Now, as you are aware with the key environment management operations the Jelastic Eclipse Plugin provides, let’s consider how to deploy a new project into Jelastic PaaS directly from your IDE.
Eclipse Plugin Application Deployment
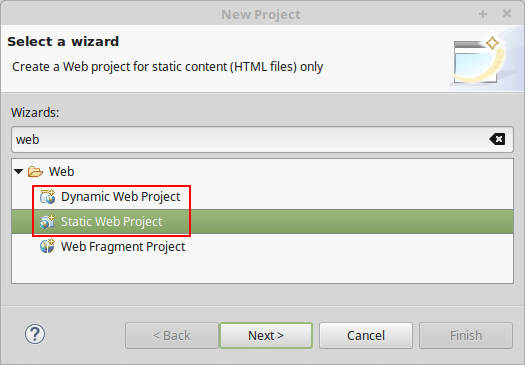
To start, you should notice that for the ability to deploy projects from Eclipse to Jelastic PaaS, they should be created as Dynamic/Static Web Projects.
A new project can be created through the File > New > Project wizard.
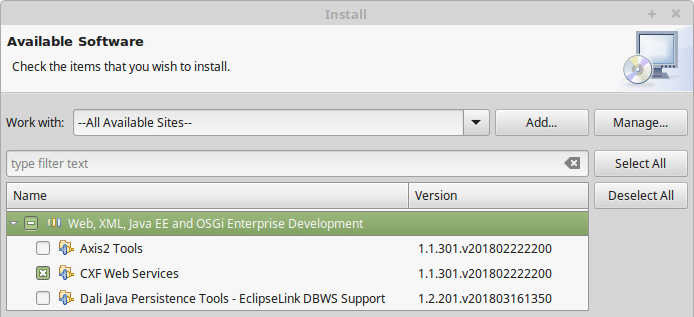
Tip: In case you don’t have such options, install the appropriate Web, XML, Java EE and OSGi Enterprise Development plugins first (can be accomplished by means of the Help > Install New Software menu).
After the plugin is installed, you may notice new Jelastic-dedicated elements being added to your Eclipse development environment interface. They are intended to implement the possibility of a new project deployment to the remote environment.
Let’s consider the provided functionality in more details.
1. At the Eclipse panel, a new button with the Jelastic logo appears, which contains the expandable drop-down menu with the Deploy and Deploy as options:
- Using the Deploy option, you can redeploy the current project to the environment under the same context, that was previously used for this project deployment;
- If the application hasn’t been deployed anywhere before, the Deploy as option should be used. In this case, the window with the list of existing Java environments at your Jelastic PaaS account will be opened for you to choose the project, environment, and context for deployment.
2. Also, deployment of an application can be initiated by selecting the corresponding Eclipse project within the Project Explorer section and choosing either the Deploy project to Jelastic or Deploy project to Jelastic as line from its context menu.
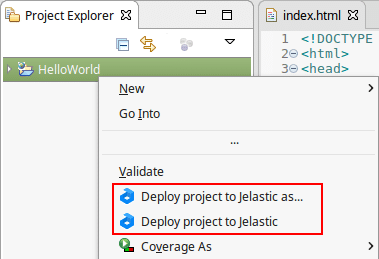
Herewith, the implemented functionality is the same as for the corresponding options, described above.
After installation of the Jelastic Eclipse IDE plugin, you can easily manage, develop and deploy your applications without switching between the IDE and the browser. So do not lose time and get started now at our Jelastic PaaS platform.