That old-school habit of choosing a single domain is passing by, and people are opting to buy multiple domain names for their projects more often nowadays.
One of the main benefits, aside from the fact that you may actually have completely different sites, is that it gives you numerous points of entry: great option when several domains lead to differently themed sites for various marketing campaigns or user experience.
Another undeniable advantage, that is especially provided by Jelastic is the ability to have more than one domain running on a single environment. For example, you can have two different Java web applications on two different domains, running within a single Tomcat instance.
And the last but not the least – efficiency and scalability, supporting your project’s future growth. This particular option is especially appreciated among startups, as they can start from running a single environment for their applications, paying only for what is used, and later on scale it up when such a need occurs.
So now we are going to show how to set up multiple domain names on the Apache Tomcat server. All you need to do, is just making some minor adjustments within Tomcat configuration files as described below.
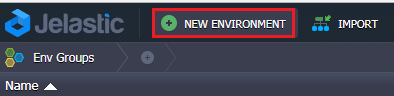
1. Log into the Jelastic PaaS dashboard and click the New environment button.
2. In the Environment Topology dialog, pick your web application server (e.g., Tomcat 9), and type your environment name, for example, multibinding.
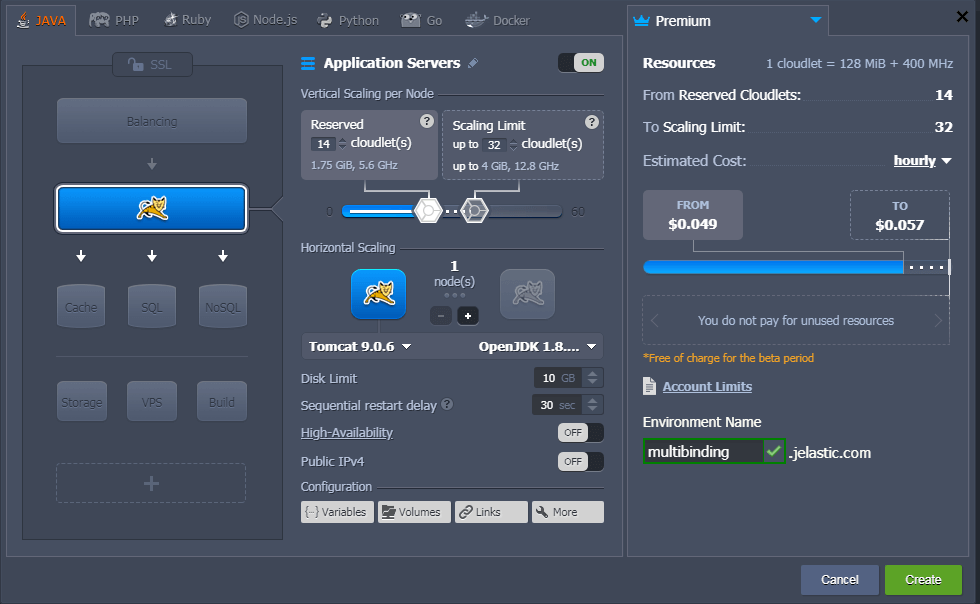
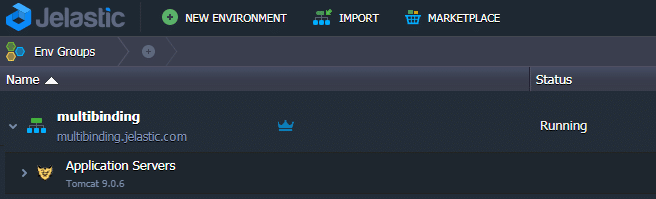
In a minute your environment will be successfully created.
3. You can buy domain names and set up them instead of default ones by adding CNAME record or by setting A Records. Read more in the Custom External Domain Name Binding document.
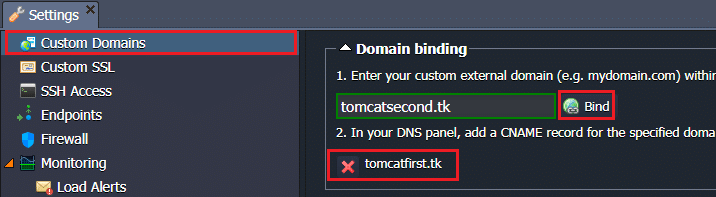
4. Go back to the Jelastic dashboard, click the Settings button for your environment and bind domain names.

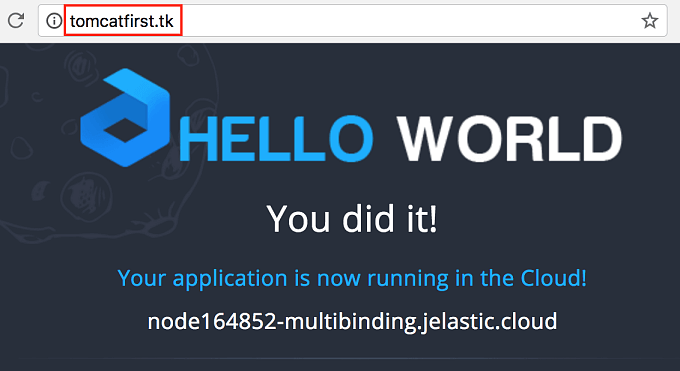
In our example, we’ll use tomcatfirst.tk for the first domain name, and tomcatsecond.tk for the second domain name.
5. Now you need to deploy the projects.
- Upload the Java application file to the Deployment Manager and press Deploy to button. As an example, we use Hello World which is available in Deployment Manager by default.
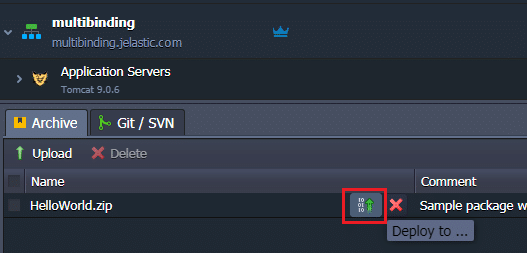
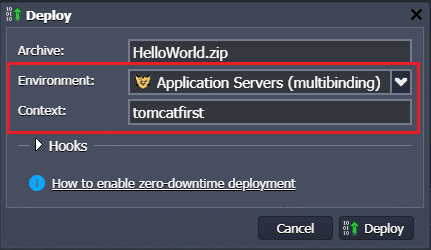
When the Deploy form appears choose your environment and assign the context (tomcatfirst, in our case). Then press Deploy button.
- Upload the second application archive. We will use modified Hello World (the words “You did it!” are recolored in red) just to see the difference in the final steps.Then deploy this application to the same environment but with different context (e.g., tomcatsecond).
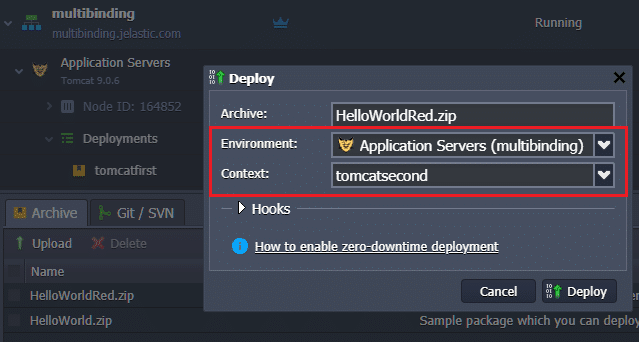
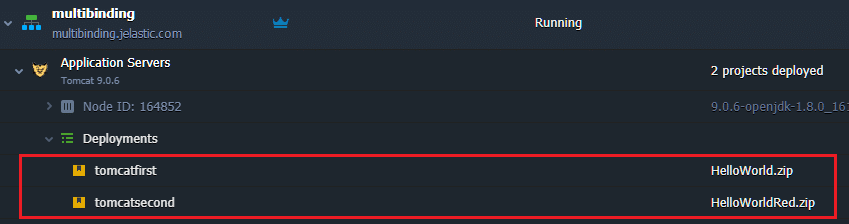
When deployment is finished, you’ll have two applications deployed in your environment.
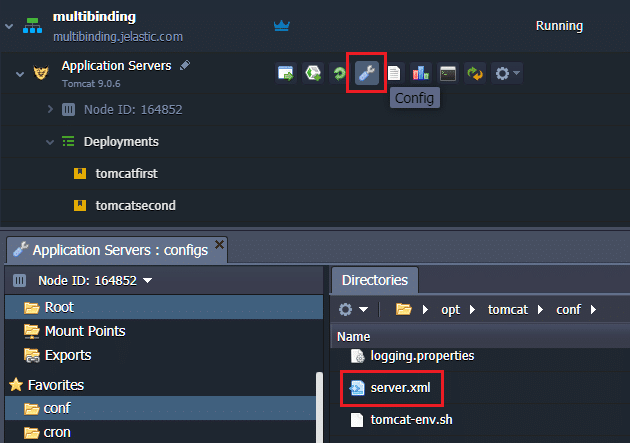
6. Now click on Сonfig button for Tomcat and navigate to server.xml file (the /opt/tomcat/conf directory).
Add <Host> tags for each domain you want to bind:
<Host name="external.domain.tld" appBase="webapps/context_name" autoDeploy="true"></pre>
<Alias>external.domain.tld</Alias>
<Context path="" docBase="${catalina.base}/webapps/context_name"/>
</Host>
In our sample, we add the following code to server.xml file:
<Host name="tomcatfirst.tk" appBase="webapps/tomcatfirst" autoDeploy="true">
<Alias>tomcatfirst.tk</Alias>
<Context path="" docBase="${catalina.base}/webapps/tomcatfirst"/>
</Host>

<Host name="tomcatsecond.tk" appBase="webapps/tomcatsecond" autoDeploy="true">
<Alias>tomcatsecond.tk</Alias>
<Context path="" docBase="${catalina.base}/webapps/tomcatsecond"/>
</Host>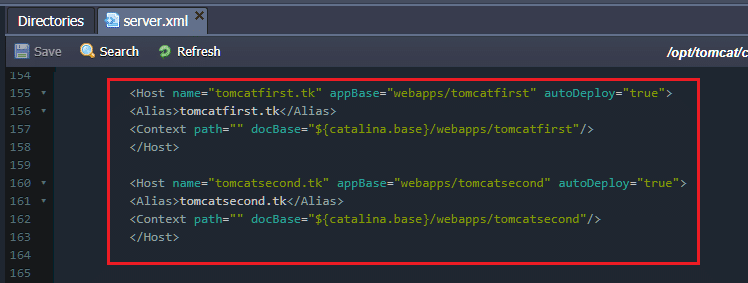
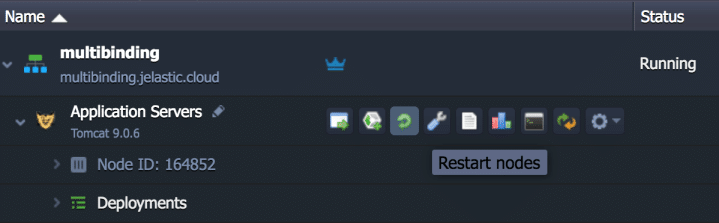
7. Save the changes and Restart Tomcat.
8. Now you can check the results. Both your applications will be available through the custom domain names running on a single Tomcat server.

Isn’t it that easy? Now you are aware of how to set up multiple domain names to increase the usability, efficiency and scalability of your Java application, as well as save your costs without having to configure separate web servers. Just sign up for free at our Jelastic PaaS platform and try it out on your own.