 In this article, we will cover the subject of fronting a Tomcat application server with Apache.
Tomcat is a secure, fast and full-featured server. It is able to reliably serve a massive volume of data. That is why it is quite comparable in performance with native web servers.
This brings up the question: Why do we need to put Tomcat behind Apache server? Such a solution is widely used to improve the performance of high-load environments. Being a fast, secure and flexible HTTP server and having a variety of modules, Apache easily provides some additional functionality for various purposes.
Here are just a few reasons to use your Tomcat app server behind Apache:
- High availability by providing load balancing between multiple Tomcat app servers;
- Static content can be processed and delivered much faster using Apache as front-end;
- Additional security issues can be easily configured in Apache and used for protecting your application located on Tomcat server;
- Extra functions can be added by using a wide range of Apache modules.
There are different ways to interconnect Apache and Tomcat. The most popular method is to set up this connection using mod_proxy or mod_rewrite which are rather easy, in configurations. With these basic configurations, Apache starts passing on requests to your back-end Tomcat server and after that, relays the responses back to the client.
Below we’ll show you three widely-used cases of using mod_rewrite and mod_proxy for running a Tomcat server behind Apache in Jelastic PaaS.
Rewriting Links
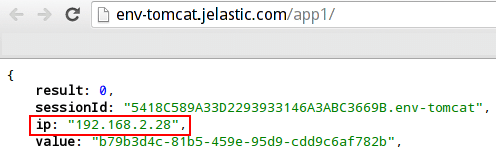
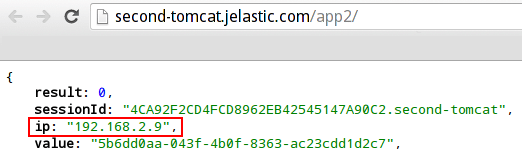
Let’s imagine that you are running two or more Java applications on separate application servers and different ports. As an example, we have deployed simple apps which show the IP addresses of the servers to easily differentiate them.
- http://env-tomcat.jelastic.com/app1/
- http://second-tomcat.jelastic.com/app2/
Using Apache with mod_rewrite you can have both of your apps available on one port just with different paths. For example:
- http://env-apache.jelastic.com/application1/
- http://env-apache.jelastic.com/application2/
This allows each application to be restarted, managed and debugged separately. At the same time, your end-users will consider them as one application.
Let’s see how to set up this in Jelastic:
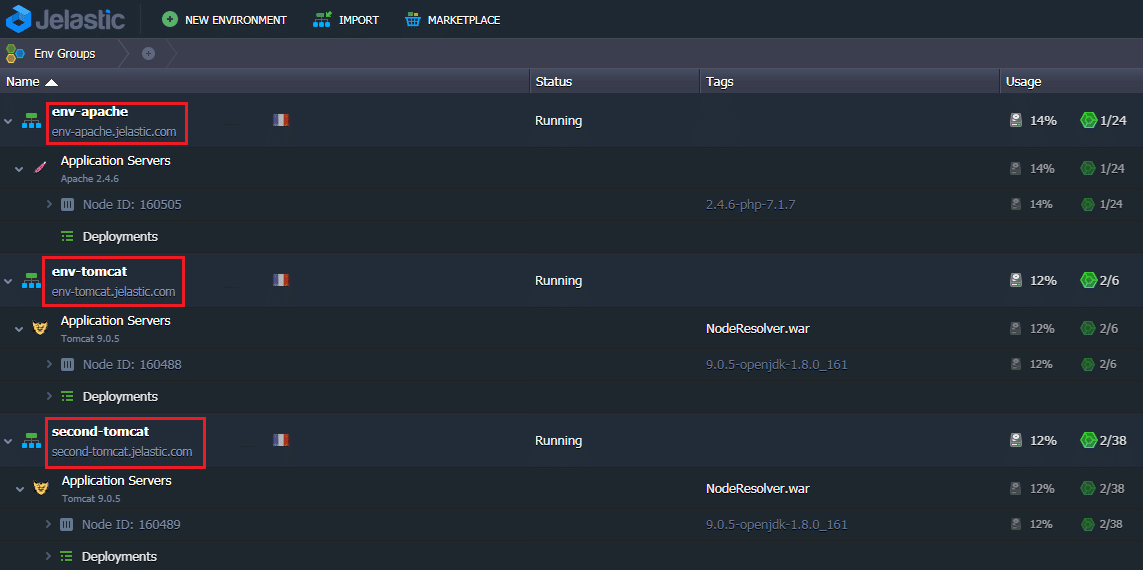
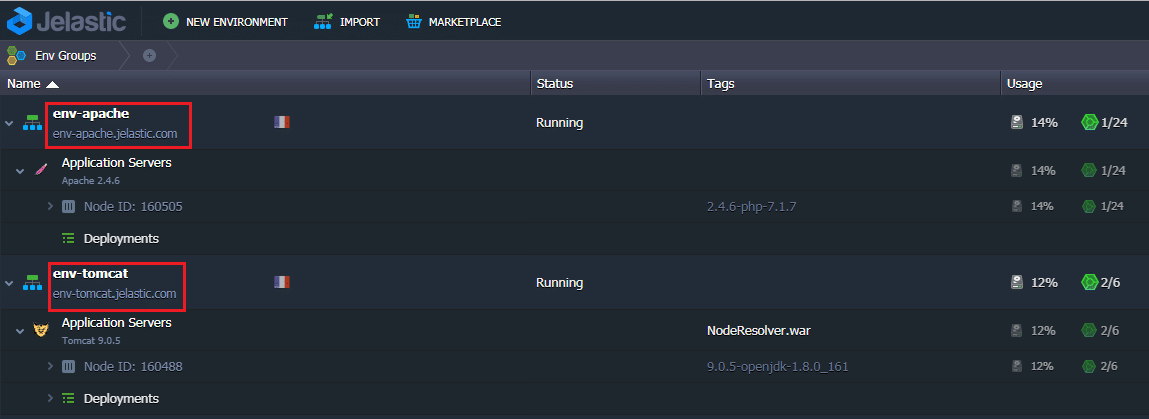
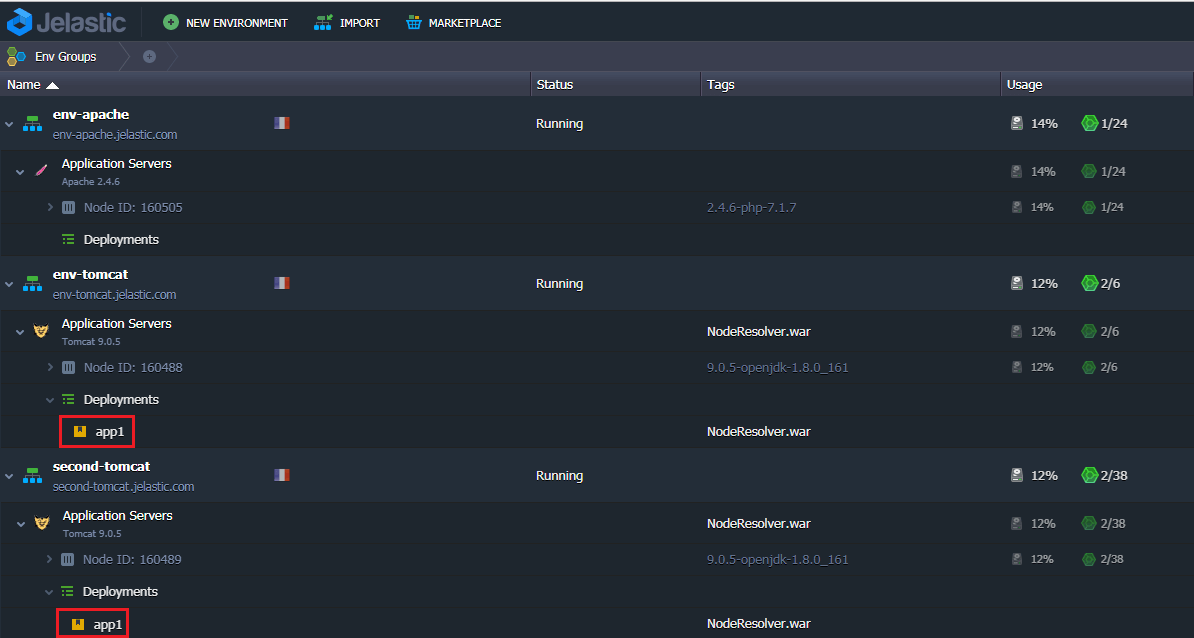
1. You need to have three (or more) environments of the following type:
- Two (or more) back-end Tomcat environments with your Java applications deployed;
- One front-end Apache environment.
2. Click Config for your Apache application server.
3. Navigate to the conf folder and open httpd.conf file. Make the following configurations in the block and Save the changes:
ServerAdmin webmaster@domain.com
DocumentRoot /var/www/webroot/ROOT
ServerName website.jelastic.com
ServerAlias *

RewriteEngine On
RewriteRule ^/application1/(.*)$ http://env-tomcat.jelastic.com/app1/$1 [P]
ProxyPassReverse /application1/ http://env-tomcat.jelastic.com/app1/
RewriteRule ^/application2/(.*)$ http://second-tomcat.jelastic.com/app2/$1 [P]
ProxyPassReverse /application2/ http://second-tomcat.jelastic.com/app2/

ErrorLog logs/dummy-host.jelastic.com-error_log
CustomLog logs/dummy-host.jelastic.com-access_log common
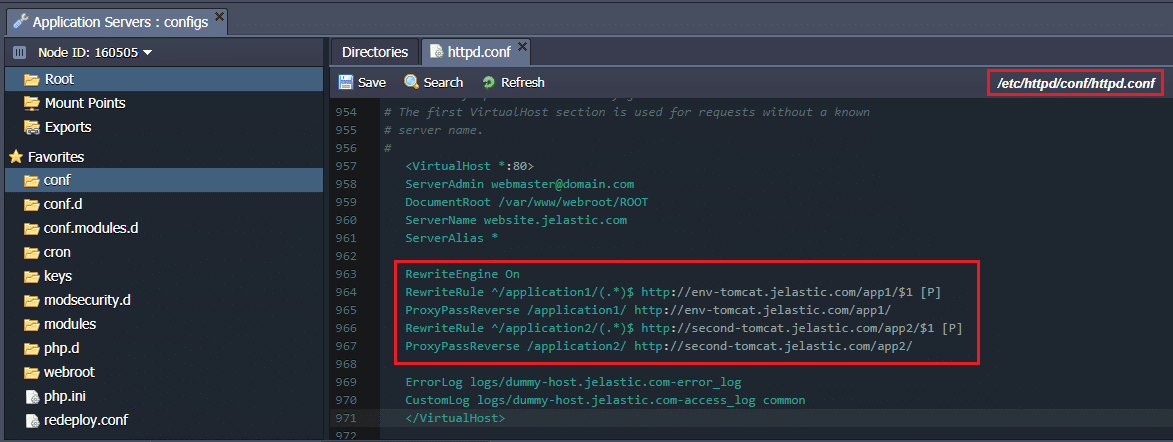
- RewriteEngine On – enables rewriting ability;
- RewriteRule and ProxyPassReverse – specify the conditions and the result of rewriting for both applications;
- RewriteLog – is optionally added to store the logs of rewriting in the specified location.
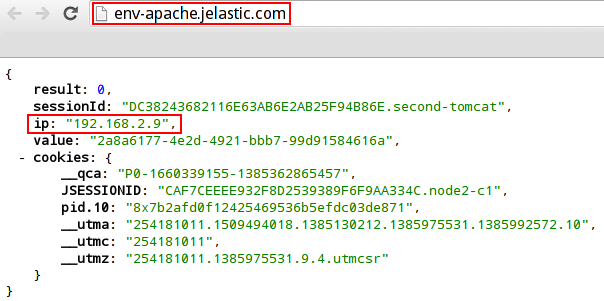
4. Restart Apache server. Check the result by clicking Open in browser and adding the path you have specified in the RewriteRule as a condition to open the right application. In our case we add:
- /application1/
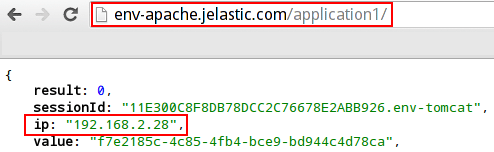
- /application2/
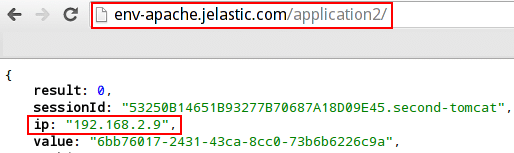
As you see, the required two applications are opened under the same port, just with a different path.
Such an approach can also be used to make clean and more descriptive links as users and search engines prefer to get useful information about page content from the URL.
Serving Static Content
To make your application work faster, you can distribute the activities between your Tomcat and Apache servers. Let your Tomcat perform the main functions by serving the application and Apache will be responsible for static content delivery. As a result, your application will be able to serve more concurrent users.

Let’s see how this can be configured in Jelastic using mod_proxy:
1. Get started with creating two environments:
- One with the Tomcat server for your application running;
- One with the Apache server for storing static content.
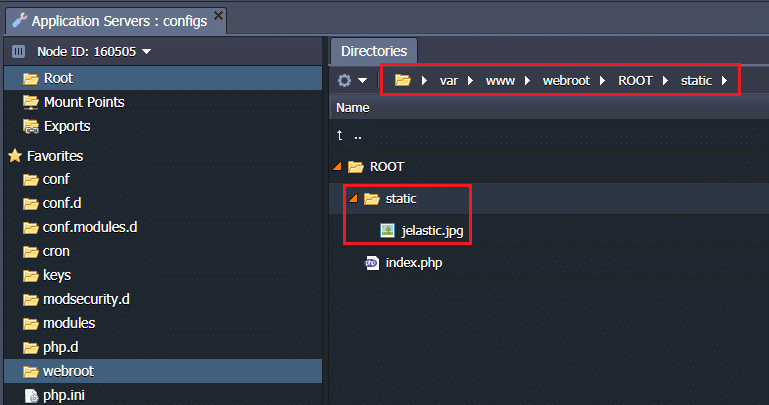
2. Click Config for your Apache app server. And create a separate folder for your static content (e.g., static) in the webroot > ROOT folder as it is shown below and upload your files to it.
3. Navigate to the conf folder and open httpd.conf file. Make the following configurations in the block and Save the changes:
ServerAdmin webmaster@domain.com
DocumentRoot /var/www/webroot/ROOT
ServerName website.jelastic.com
ServerAlias *
ProxyPass        /static !
ProxyPass        / http://env-tomcat.jelastic.com/app1/
ProxyPassReverse / http://env-tomcat.jelastic.com/app1/
ErrorLog logs/dummy-host.jelastic.com-error_log
CustomLog logs/dummy-host.jelastic.com-access_log common
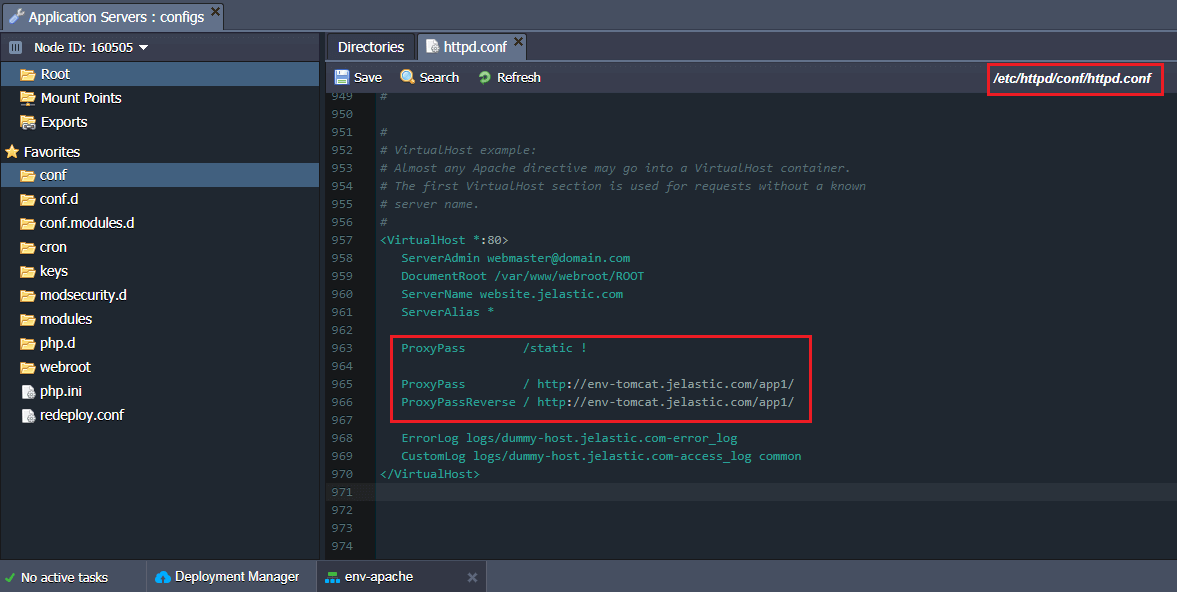
ProxyPass /static ! states that we don’t proxy any request beginning with the keyword /static/ (you need to state their the name of your folder for content). The rest of the requests are going to be proxied to our application, deployed on Tomcat (the path to the application is defined by ProxyPass and ProxyPassReverse).
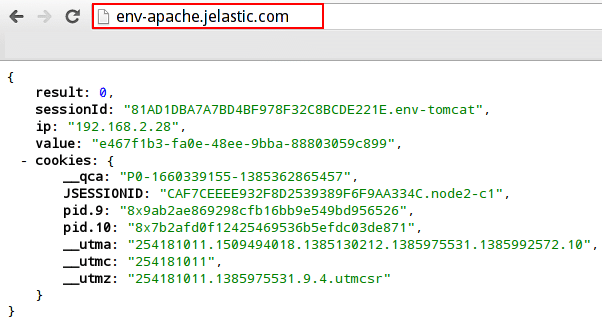
4. Restart Apache server and check the result by clicking Open in browser for your Apache environment. You’ll see your application proxied from your Tomcat server.
5. Specify the path to your static content in the URL and it will be also available.

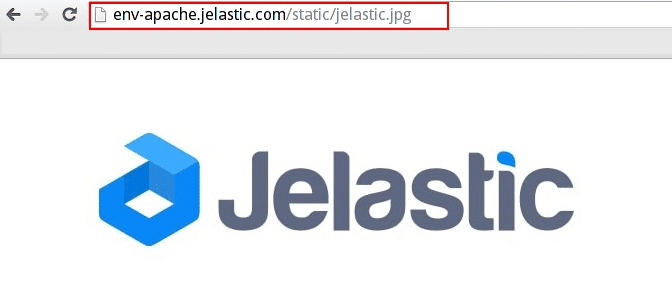
As a result, both the application located on Tomcat and static content stored in Apache are available at the same port.
Load Balancing
To handle additional load or just get some sort of fail-over, you can add more Tomcat application servers. And, an Apache server can be used in order to distribute the load between these Tomcat servers.
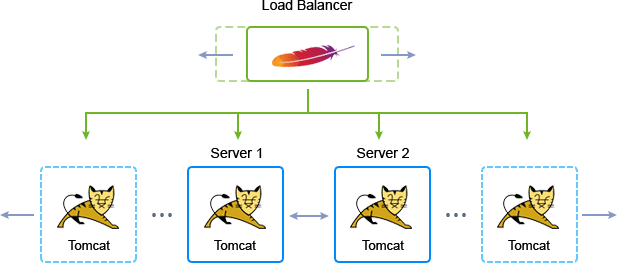
This can be done within a single environment (where Apache will be chosen as a load balancer) or in two separate environments. In the first case, you can add Apache server while creating the environment via topology wizard:
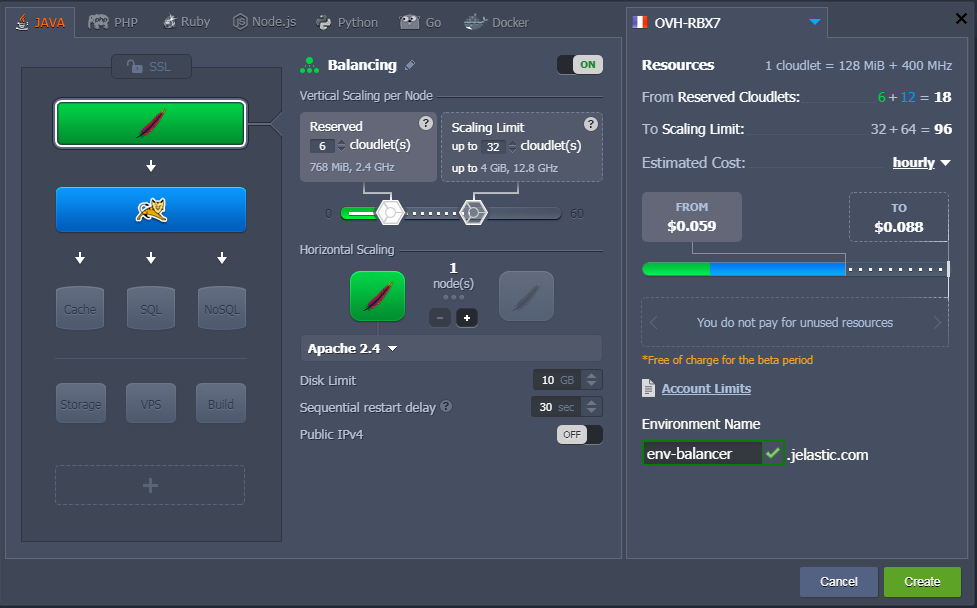
As a result, this Apache will automatically start evenly distribute the load among the Tomcat servers.
If you have several environments with different applications deployed, you should create a separate environment with Apache and configure it for load balancing with mod_rewrite.
Below we describe the main steps that should be performed for this configuration using three environments:
- Two back-end Tomcat environments with Java applications deployed (note that you need to use the same context for deploying both applications);
- One front-end Apache environment.
1. Click Config for your Apache server. Navigate to the conf.d folder and create a new file e.g., servers_list.
2. In the created file, add the hosts of your environments with deployed applications in the following format:
servers {env1_name}.{hoster_domain}|{env2_name}.{hoster_domain}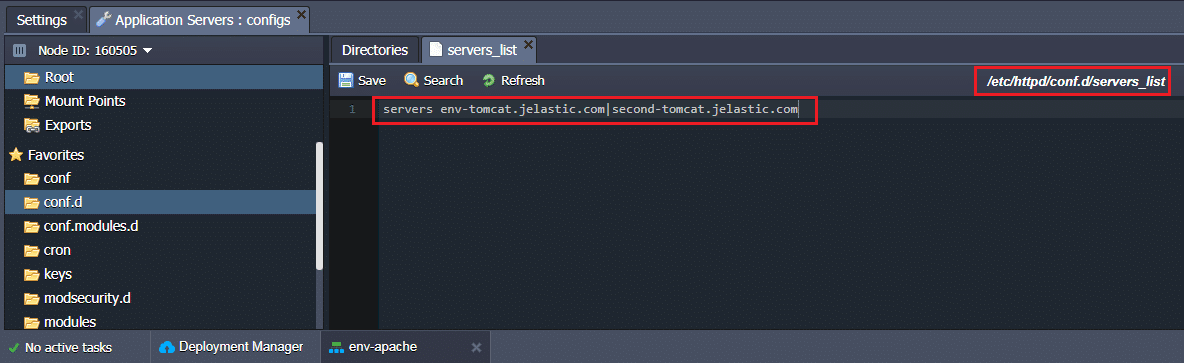
3. Go to the conf folder and make the following configurations in the httpd.conf file:
ServerAdmin webmaster@domain.com
DocumentRoot /var/www/webroot/ROOT
ServerName website.jelastic.com
ServerAlias *
RewriteEngine On
RewriteMap lb rnd:/etc/httpd/conf.d/servers_list
RewriteRule ^/(.*) http://${lb:servers}/app1/$1 [P,L]ErrorLog logs/dummy-host.jelastic.com-error_log
CustomLog logs/dummy-host.jelastic.com-access_log common

- RewriteEngine On – enables rewriting ability;
- RewriteMap – states the path to the hosts listed in the earlier created file;
- RewriteRule – specifies the conditions of the load balancing;
- RewriteLog – is optionally added to store the logs of rewriting in the specified location.
4. Restart your Apache server.
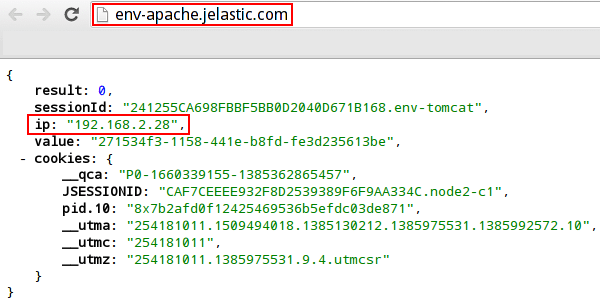
5. To see the result, click Open in browser for your Apache application. You’ll see one of your applications deployed on Tomcat. Refresh the page (once or several times) and as a result of load distribution, your second app will be opened.
These are just some basic cases of using Apache as a front-end of your Tomcat server. You can get even more benefits from combining Apache with Tomcat. We hope that these instructions will help you to make your application even more high-performing, flexible and stable.
Implement your use case of Apache and Tomcat combination by registering a free trial at our Jelastic PaaS.