![]() Django CMS is a free open-source content management system based on the Django web framework, which ensures a quick integration of the databases and new modules. Django CMS helps to simplify the process of creating complex websites due to its intuitive and easy-to-learn drag and drop interface. Simultaneously, it is powerful and expandable enough to satisfy the most demanding content editors.
Django CMS is a free open-source content management system based on the Django web framework, which ensures a quick integration of the databases and new modules. Django CMS helps to simplify the process of creating complex websites due to its intuitive and easy-to-learn drag and drop interface. Simultaneously, it is powerful and expandable enough to satisfy the most demanding content editors.
Today, we’ll overview the steps required to automatically or manually install the Django CMS solution to the cloud with Jelastic PaaS.
Django CMS Automatic Installation
You can automatically get a preconfigured ready-to-work Django CMS instance up and running within minutes using the Jelastic PaaS Marketplace.
1. Log in to your Jelastic PaaS account and click the Marketplace button at the top of the dashboard.

2. Search for the DjangoCMS solution in the opened window.
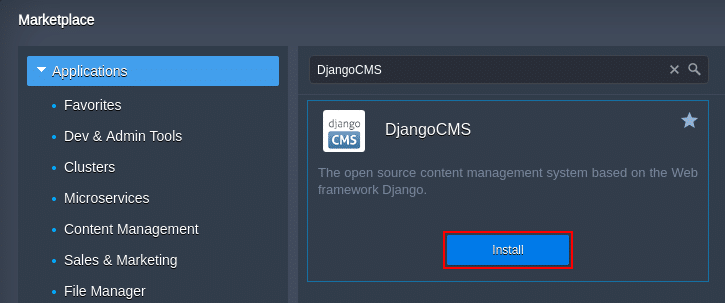
Hover over the located package and click Install.
3. Within the appeared installation frame, you can adjust the following fields:
- Environment – set an environment name;
- Display Name – define a preferable alias;
- Region – select an environment region (if multiple are available).
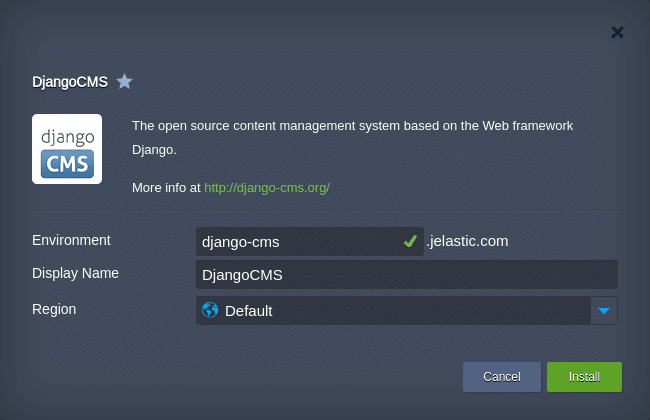
Proceed with the Install button.
4. That’s it! In just a few minutes your Django CMS application will be installed.
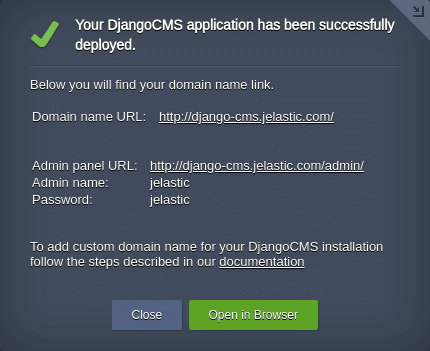
Use the information within the pop-up to access your Django CMS home and admin panel pages.
Django CMS Manual Installation
You can deploy Django CMS manually with the help of the following step-by-step instruction and take the complete control over the process.
Let’s start by creating an environment for Python applications hosting. To do this, follow the next steps:
1. Click the NEW ENVIRONMENT button.

2. Navigate to the Python programming language tab, where the Apache application server will be selected automatically. State the resource limits, choose the region (if available) and enter the name (e.g., django-cms) for your environment.
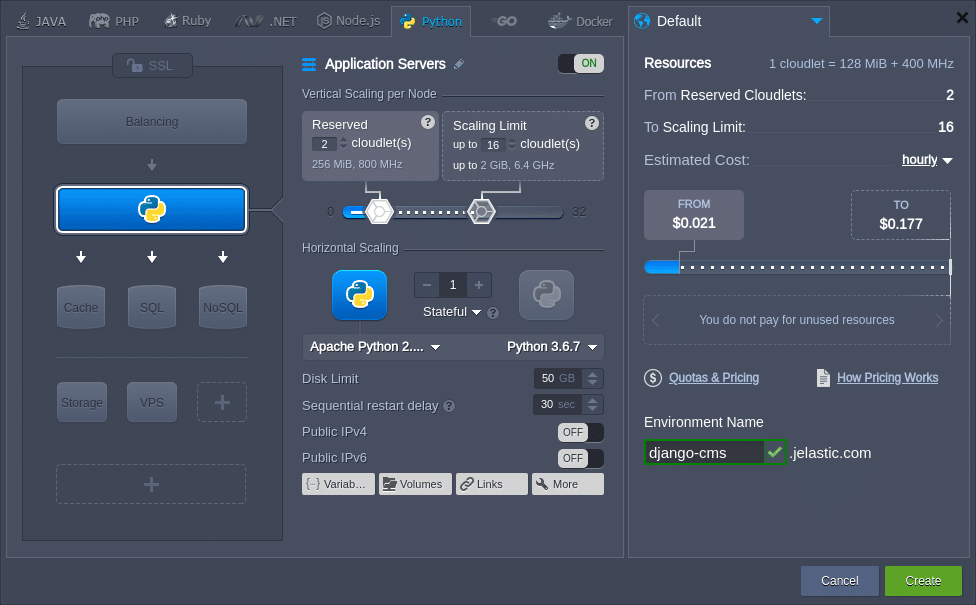
- Currently, the Django CMS does not support Python 3.7, so select the version appropriately;
- Django CMS requires a database; herewith, you can use:
- SQLite – is implemented by default and does not require any additional configurations (data is stored locally on the same container as your application); this solution is suitable for the development and testing purposes;
- external SQL database (e.g., MySQL or PostgreSQL) – is a secure and reliable option to be used for the production environments.
Finally, click Create at the bottom right corner of the frame.
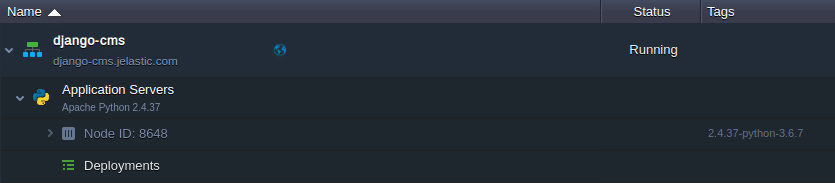
3. Just in a minute, your environment will appear at the dashboard.
Now, you can install Django CMS from scratch or deploy your existing application into the environment. We’ll check both these options one-by-one.
Install Django CMS
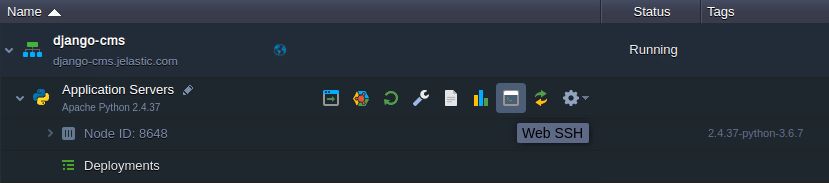
1. Connect to your application server via Web SSH:
2. You should create an isolated virtual Python environment for your application, using the virtual environment tool, which allows managing projects’ dependencies independently without administrator privileges:
virtualenv virtenv
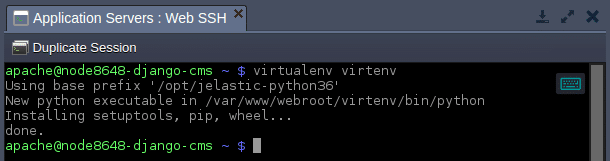
3. Activate and switch to the newly created virtual environment by executing the next command:
source virtenv/bin/activate

4. Install the Django CMS installer using the pip package manager:
pip install djangocms-installer

Wait a minute for the operation to be completed.
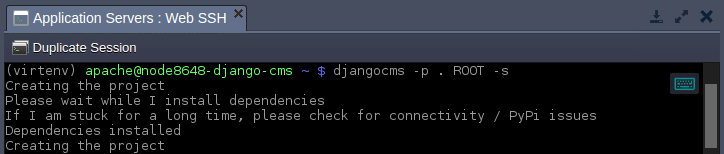
5. Next, remove the pre-installed application and create a new Django CMS application:
rm -rf ROOT
djangocms -p . ROOT -s
6. Edit the mod_wsgi module (the /var/www/webroot/ROOT/wsgi.py file) by replacing its content with the lines below:
import os,sys
virtenv = os.path.expanduser('~') + '/virtenv/'
virtualenv = os.path.join(virtenv, 'bin/activate_this.py')
try:
	if sys.version.split(' ')[0].split('.')[0] == '3':
		exec(compile(open(virtualenv, "rb").read(), virtualenv, 'exec'), dict(__file__=virtualenv))
else:
	execfile(virtualenv, dict(__file__=virtualenv))
except IOError:
	pass

sys.path.append(os.path.expanduser('~'))
sys.path.append(os.path.expanduser('~') + '/ROOT/')

os.environ['DJANGO_SETTINGS_MODULE'] = 'ROOT.settings'

from django.core.wsgi import get_wsgi_application
application = get_wsgi_application()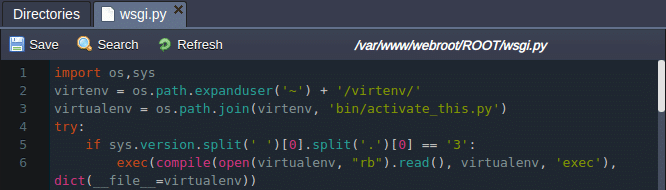
Save the changes.
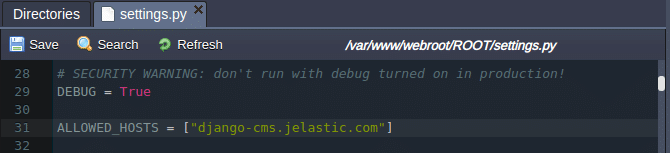
7. Adjust the next parameters in the /var/www/webroot/ROOT/settings.py configuration file:
ALLOWED_HOSTS = ["{envDomain}"]

MEDIA_ROOT = os.path.join(DATA_DIR, 'ROOT', 'media')
STATIC_ROOT = os.path.join(DATA_DIR, 'ROOT', 'static')

STATICFILES_DIRS = (
	os.path.join(BASE_DIR, 'ROOT', 'static_local'),
)- ENGINE – database type (django.db.backends.mysql for MySQL or django.db.backends.postgresql_psycopg2 for PostgreSQL);
- NAME, USER, PASSWORD – database account credentials to connect;
- HOST – database hostname (from the email received after database creation);
- PORT – database port (3306 for MySQL or 5432 for PostgreSQL).
Don’t forget to Save the changes.
8. Create new sub-directories for the static/media content and run the synchronization of resources:
mkdir ROOT/static_local
mkdir ROOT/media
python manage.py collectstatic

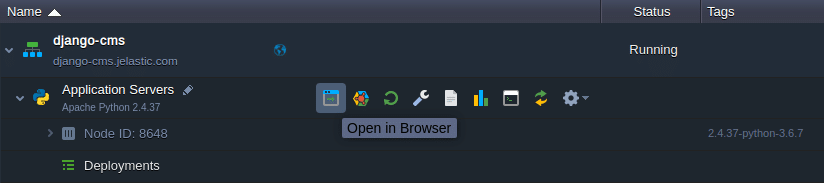
9. That’s all! Now, you can access your environment by clicking Open in Browser.
Within the opened page log in to the admin panel using the default admin/admin credentials.
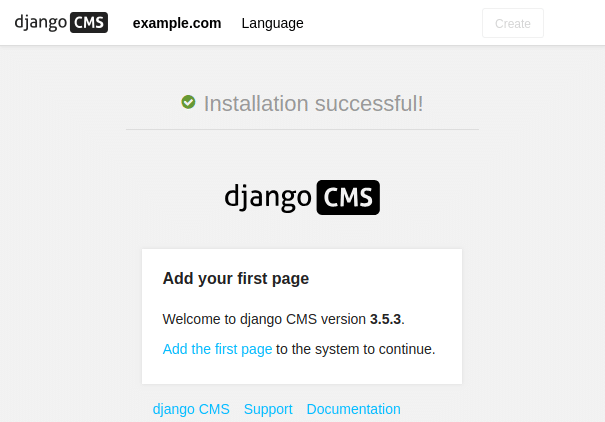
Now you can immediately start working by creating your first page with Django CMS.
Deploy Existing Django Application
In case you have already the previously built and packaged Django application, the deployment procedure can be performed just in a few steps.
- requirements.txt – file with the names of all the Python modules your application requires, it will be read by the deployment script to install the listed modules via the pip manager automatically;
- wsgi.py – file with the entry point script for running your application inside a virtual environment using the mod_wsgi for Apache.
1. Upload your application to the deployment manager, for example:
https://download.jelastic.com/public.php?service=files&t=37fb2dedbc72453fe73fbe2e890a10f2&download

2. Deploy your Django application into the environment with the Apache Python application server.
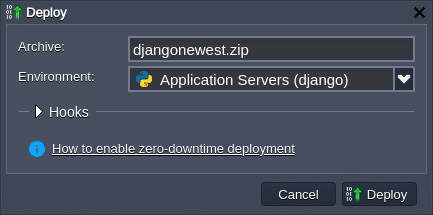
3. In a minute (after successful deployment), click the Open in Browser button for your environment to access the application.
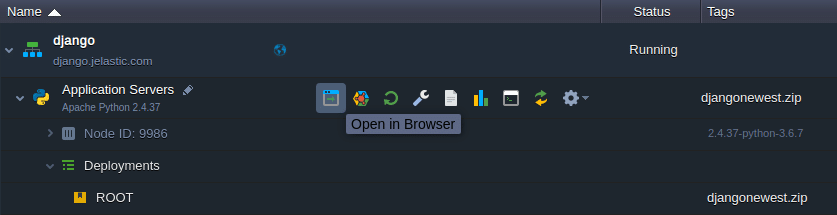
4. Done! Your Django application is up and running in just a few minutes!
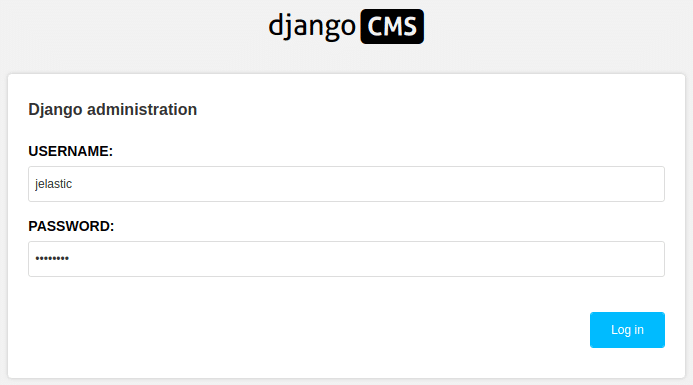
With our example, you’ll be redirected to the Django CMS admin panel, where you should log in with the default jelastic/jelastic credentials to start working.
As you can see, it’s quite easy to deploy Django-based applications with the Jelastic PaaS Python hosting. Try it yourself with a free trial at our Jelastic PaaS platform.