Ghost is a simple but powerful Node.js-based publishing platform, allowing people to share their stories with the whole world. It’s absolutely free and an open source project for blogs, available for use to anyone. Ghost provides a set of special tools, aimed to make blogging easy and even fun. In addition, this application has a great design and can be customized according to your preferences and requirements.
Now let’s check out several simple steps, describing smooth deployment of your Ghost project within Jelastic PaaS.
Create an Environment
1. Log into your Jelastic account and click New Environment button at the top dashboard panel.

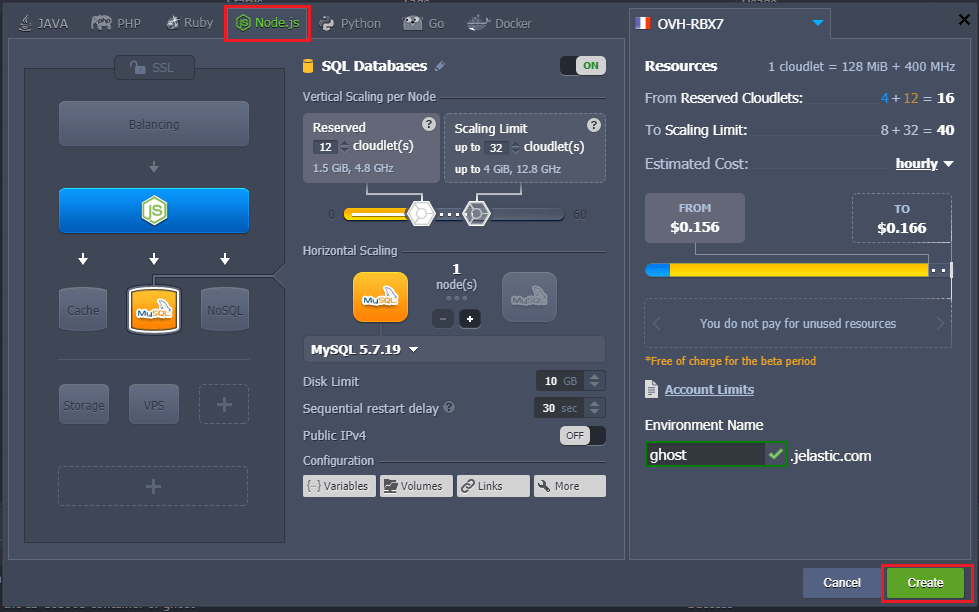
2. In the appeared dialog box select the Node.js tab, wherein NodeJS application server will be already chosen by default. Add MySQL database and specify the desired resource limits for the environment with the help of sliders, type your environment name (e.g., ghost), and click the Create button.
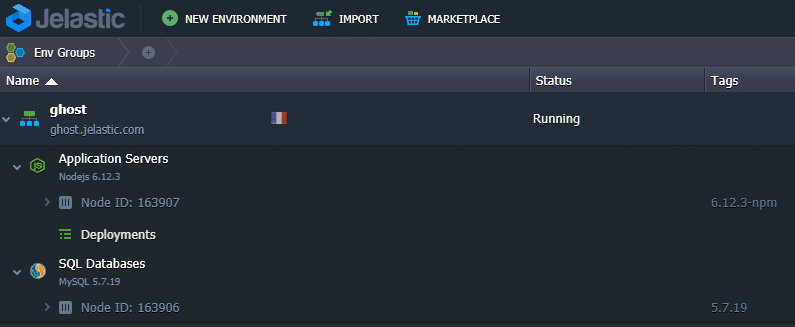
3. Wait about a minute for your environment to be created.
Add Project
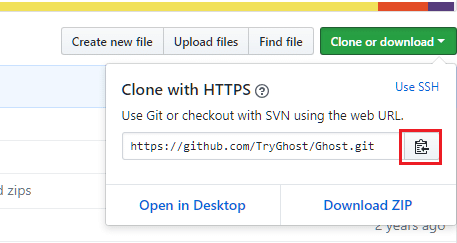
1. As an open-source project, Ghost can be easily taken from its repository at GitHub: you just have to press Clone or download button and copy the corresponding link.
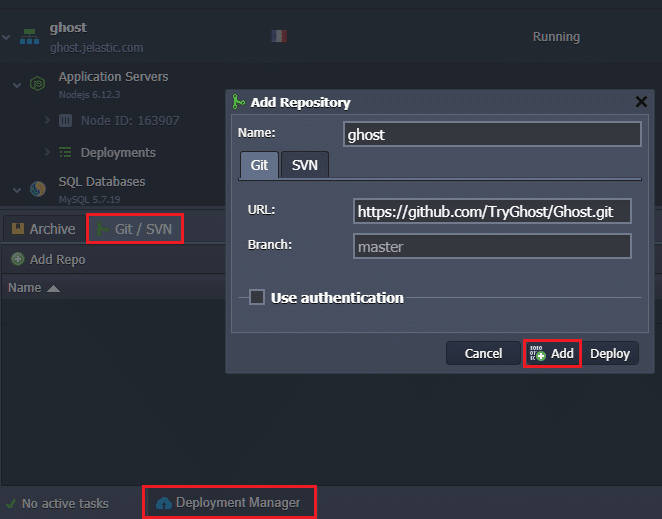
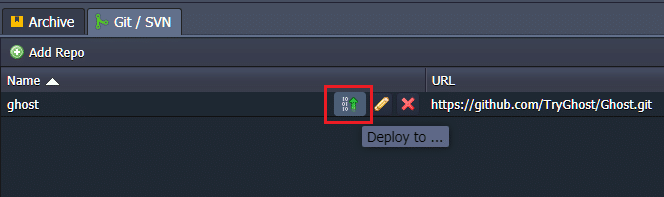
2. Return to the Jelastic dashboard, open Deployment manager > Git/SVN tab and click Add Repo button. Paste the copied link to URL field in the appeared form, name your application (e.g., ghost) and press Add button.
3. Once Ghost repository has been added to Deployment manager, press Deploy to button.
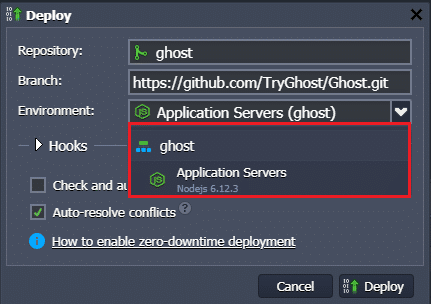
4. Choose your environment in the appeared form and press Deploy.
Wait a minute until your project is built and deployed.
Additionally, you can set up deployment hooks and automatic deploy (follow corresponding links for the instructions).
Connect MySQL Database
Now let’s connect to MySQL using phpMyAdmin.
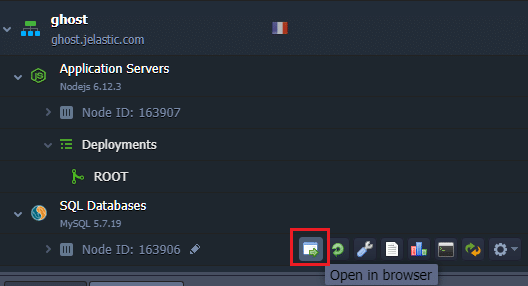
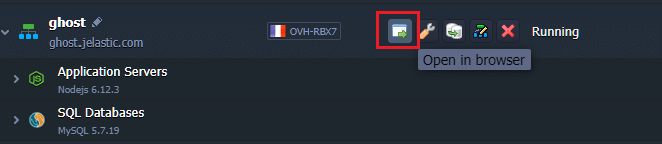
1. In order to access admin panel, simply press the Open in browser button located near your SQL Database Node.
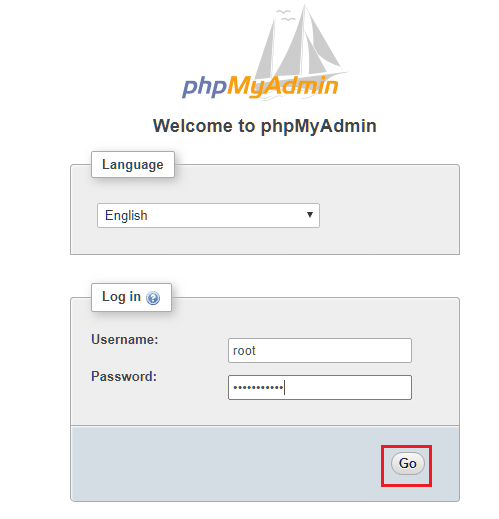
2. Input your Username and Password, which are sent to you by email while creating MySQL node, and press Go button.
3. In phpMyAdmin dashboard click Databases tab, specify the database name (e.g., ghost), and create MySQL database by pressing Create button.
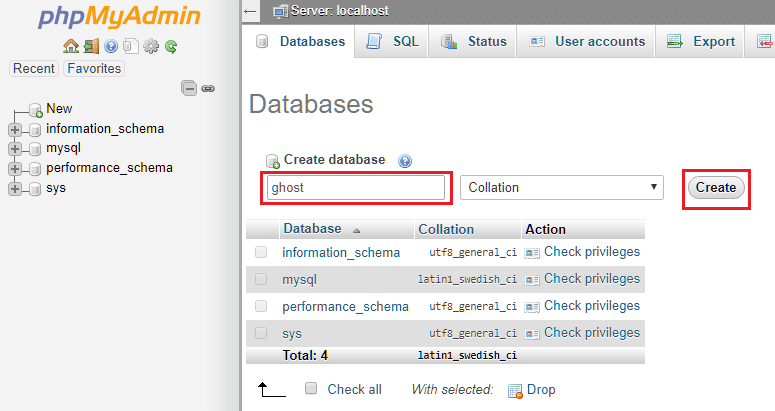
The created Ghost database will be displayed in the list of available databases.
Configure Your Node.js Server
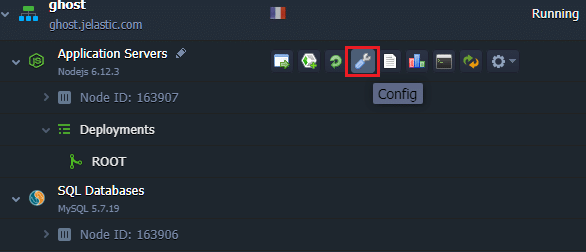
Change Node.js configuration files by pressing Config button next to the application server layer within Jelastic dashboard.
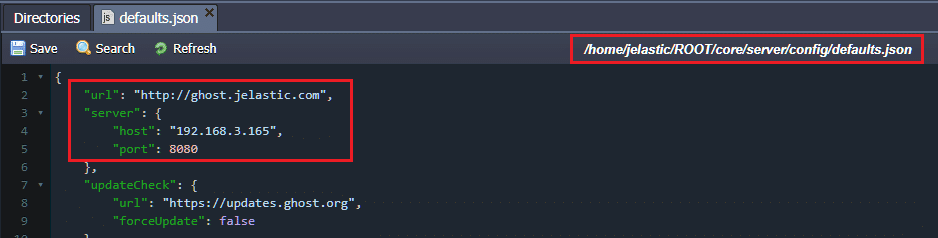
1. In the /home/jelastic/ROOT/core/server/config/defaults.json file, change url and server sections by substituting <environment URL> with the actual link to your environment and <internal IP of Node.js container> with actual IP address of your Node.js node.
{
"url": "<environment URL>",
   "server": {
       "host": "<internal IP of NodeJS container>",
       "port": 8080
   }
}
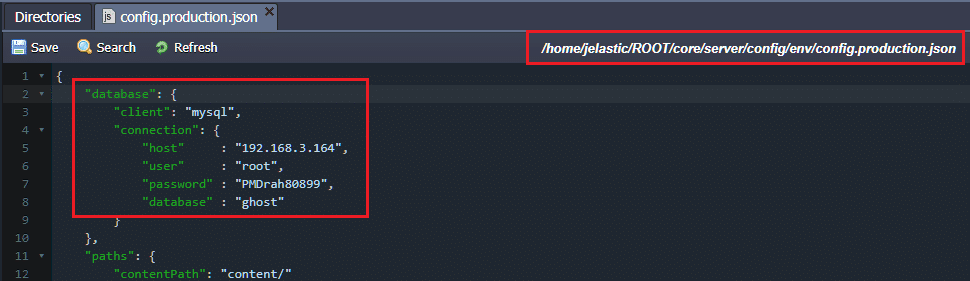
2. In the /home/jelastic/ROOT/core/server/config/env/config.production.json file, change section database.
{
  "database": {
       "client": "mysql",
       "connection": {
           "host" : "<internal IP of MySQL container>",
           "user" : "<DB user from email>",
           "password" : "<DB pass from email>",
           "database" : "<DB name>"
       }
   }
}
Substitute:
- <internal IP of MySQL container> with actual IP address of your MySQL container;
- <DB user from email> and <DB pass from email> with Username and Password which were sent to you by email while creating MySQL node;
- <DB name> with the actual Database name that was created in Create MySQL database section (ghost, in our case).
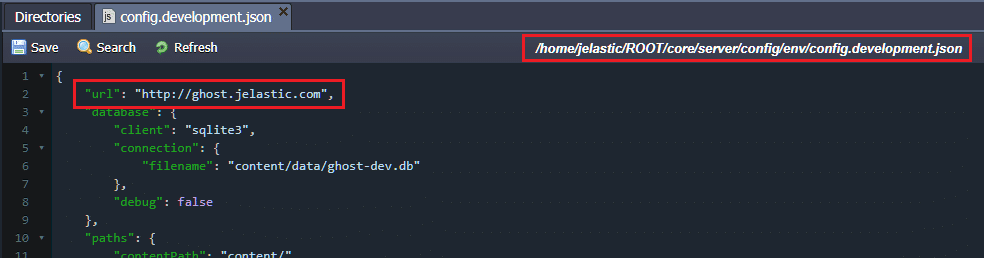
3. In the /home/jelastic/ROOT/core/server/config/env/config.development.json file, change section url by pasting the actual link to your environment.
{
  "url": "<environment URL>"
}
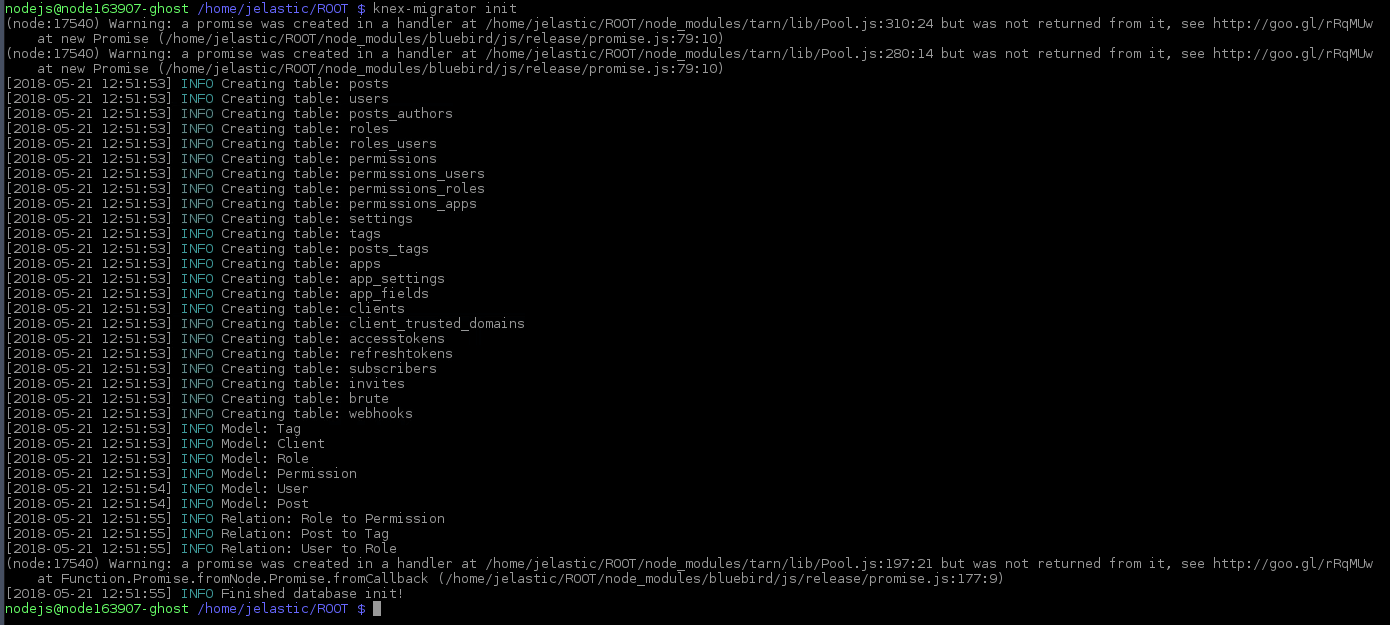
4. Connect to Node.js server using Web SSH.

Execute the following commands one by one to install database migration tool for knex which is a query builder for MySQL.
Move to ROOT directory:
cd ROOT/
sudo npm install -g knex-migrator
Initialize your database based on your init scripts:
knex-migrator init
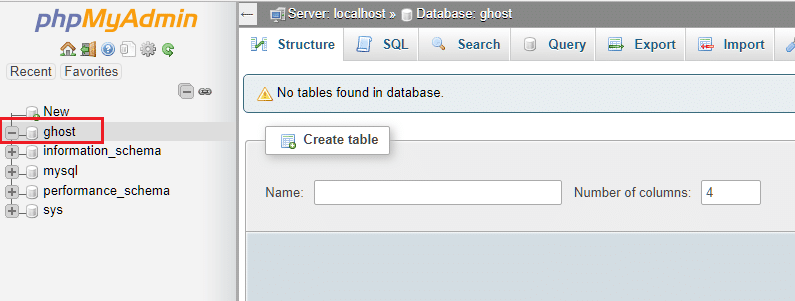
5. When the previous steps are successfully performed, all the necessary tables will be created and displayed in the following way.
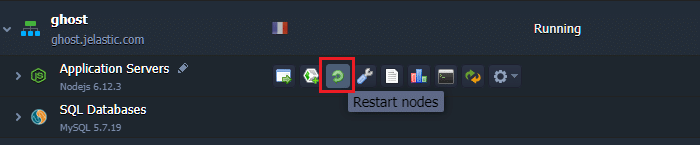
6. Finally, update the Node.js server using Restart nodes button to apply the changes.
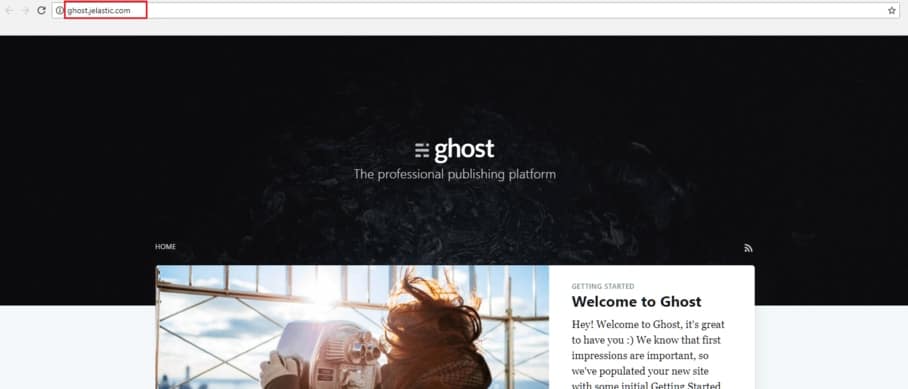
Thus your Ghost application has been successfully hosted within the Jelastic platform. To get started, you just need to launch it by pressing Open in browser button.
Congratulations! Now you can benefit from all the functionality of the Ghost application, creating and running your online publications powered up by Jelastic PaaS. Try it out, just sign up for a free trial at our Jelastic PaaS platform.